How To Create A Sourdough Starter, Day 1 To Day 8
How to Make a Sourdough Starter
A simple, repeatable method you can stick with
Introduction: Raising Something Alive
People love naming their sourdough starters... I get it, I've heard Yeastie Boys or Doughy Parton, even Breadward Cullen. If that is what moves you to start your own I'm all for it! Personally? I just call mine “starter".
Whether you name yours or not, what’s inside that jar is alive, a small, bubbling ecosystem made of flour, water, and patience. Over time, it learns your routine, your kitchen’s temperature, even your habits. You feed it, it grows. You neglect it, it sulks. Kind of like that one house plant you forgot to water a few too many times.
But this little jar is where the miracle happens. With just two basic ingredients, you can grow a living culture that'll raise every loaf, pizza, or focaccia you ever bake. No store-bought yeast. No additives. Just wild yeast, good bacteria, and time doing exactly what God designed it to.
This method keeps things simple and reliable. You’ll start strong with whole wheat flour to wake up the yeast, then shift to all-purpose for that smooth, balanced texture. By the end of the week, you’ll have a healthy, thriving starter ready to power your next bake and maybe earn a name if you’re into that.
Tools You’ll Need
Glass jar (16-32 oz, wide mouth): Room to grow, easy to stir and feed.
Lid or cover (not airtight): Use a loose lid, towel, or paper towel with a rubber band.
Digital kitchen scale: For accuracy. Measuring cups can work, but a scale ensures consistency.
Measuring cups: For weighing and measuring amount of water and flour.
Wooden spoon or silicone spatula: For stirring and scraping. Keep a few on hand.
Rubber band or masking tape: Mark your rise line to track growth.
Small bowl: For discarding and weighing.
Ingredients
Whole wheat flour – rich in natural yeast and nutrients.
Unbleached all-purpose flour – mild, smooth texture.
Spring or filtered water – avoid chlorine, which kills yeast.
Quick Overview: Day 1-8 at a Glance
Day 1: Start in a clean jar. Add 60 g whole wheat + 60 g water. First mix, rest 24 hrs
Day 2: Keep 60 g then add 60 g whole wheat + 60 g water. First discard & feed
Day 3: Keep 60 g then add 30 g whole wheat + 30 g AP + 60 g water. Introduce AP flour
Day 4: Keep 60 g then add 15 g whole wheat + 45 g AP + 60 g water. Looser texture, normal dip
Day 5: Keep 60 g then add 15 g whole wheat + 45 g AP + 60 g water. Save discard for cooking
Day 6: Keep 60 g then add 10 g whole wheat + 50 g AP + 60 g water. Active bubbles, smoother texture
Day 7: Keep 60 g then add 10 g whole wheat + 50 g AP + 60 g water. Often doubles in 6-8 hrs
Day 8: Keep 60 g then add 45 g whole wheat + 45 g AP + 90 g water. Build extra to bake & sustain
Ideal Water & Room Temperature Guide
65-69°F room use 85°F water
70-75°F room use 80°F water
76-80°F room use 75°F water
80°F+ use room temp water
Warm water speeds up fermentation; cool water slows it. Use this to time your starter’s peak to match your schedule. I didn't run into any issues using room temp water and my house sits between 72-75°.
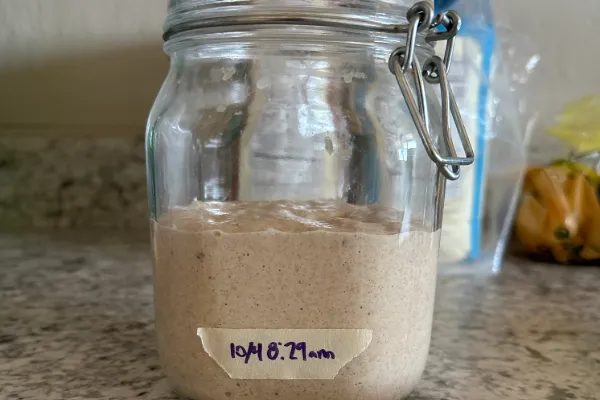
Day 1
Mix
In a clean jar, combine 60 g whole wheat flour with 60 g spring water.
Stir until no dry flour remains, scrape the sides down.
Mark and cover
3. Place tape or a rubber band at the level.
4. Cover loosely, not airtight.
Ferment
5. Rest at 70-75°F for 24 hours.
Why start with whole wheat
Whole wheat carries more native yeast and minerals. It wakes things up faster. We will shift to mostly all-purpose for a smoother, versatile starter.
What to expect
Maybe a few tiny bubbles and a faint earthy smell. It is also normal to see nothing yet.
Day 2
Discard and feed
Stir once to loosen.
Discard all but 60 g of starter. See below for discard instructions.
Add 60 g whole wheat flour and 60 g water.
Mix smooth, scrape down, mark the level, cover loosely, rest 24 hours.
If you cannot feed exactly at 24 hours, up to 25-28 hours is fine. Stir once if you will be much later. Consistency matters more than perfection.
How To Discard, Step By Step
Put a bowl on the scale, tare to zero.
Scoop all the starter into the bowl.
Put the clean jar on the scale, tare to zero, then return 60 g starter to the jar.
Add the day’s flour and water, mix together until smooth, scrape down, mark, cover loosely.
You can also eyeball the 60 g if you are comfortable, but weighing keeps things consistent. This is the same basic process you will follow each day.
You can throw your discard in the trash or use it for compost.
Day 3
Discard to 60 g, then feed
30 g whole wheat + 30 g all-purpose, plus 60 g water.
What to expect
Your starter may seem active one day, quiet the next, this is natural. The strong yeast and bacteria are establishing balance while the early gas-producing bacteria die off.
Day 4
Discard to 60 g, then feed
15 g whole wheat + 45 g all-purpose, plus 60 g water.
Pick your path
More whole wheat, more rustic flavor and vigor.
More all-purpose, milder flavor and softer texture, great for pizza, pasta, focaccia.
Healthy signs
Looser texture, small bubbles on the sides, gentle rise then level off. If you don’t see any rise yet, do not worry.
Day 5
Discard to 60 g, then feed
15 g whole wheat + 45 g all-purpose, plus 60 g water.
Now your discard is useful
From today forward, save discard in the fridge and use it for pancakes, waffles, crackers, flatbreads, or muffins. It gives flavor, not lift. See below for more details on how to save and use your discard.
Day 6
Discard to 60 g, then feed
10 g whole wheat + 50 g all-purpose, plus 60 g water.
What to expect
More bubbles, a mild tang, a small dome. It may rise 25–50 percent. A gentle stir mid-day is optional.
Day 7
Discard to 60 g, then feed
10 g whole wheat + 50 g all-purpose, plus 60 g water.
Readiness checks
Doubles in 6-8 hours at room temp.
Smells pleasantly yeasty and slightly tangy.
Float test: drop a small spoonful in water, if it floats, it is airy and ready to leaven.
If it peaks at midnight, move tomorrow’s feeding earlier to shift the peak into your baking window.
Day 8, Build To Bake
If your starter is doubling, it’s time to prep for your first bake.
If you plan to bake today, build more starter so you can use some and still keep some.
Discard to 60 g, then feed
45 g whole wheat + 45 g all-purpose, plus 90 g water.
Mark the level. It should peak about 5-6 hours later near 72–75°F. Use the starter at or just before peak for best strength.
Example schedule
Feed with an increase flour-to-water ratio (depending on your recipe needs) at 8:00 a.m.
It peaks around 1:00-2:00 p.m.
Measure the starter your recipe needs.
Keep at least 60 g in the jar and immediately feed it 10 g whole wheat + 50 g all-purpose + 60 g water so your culture continues.
If baking again soon (1-2 days): keep it at room temp, feeding every 24 hours.
If not baking soon: let it rise after feeding, then refrigerate.
Saving And Using Discard
Save it
Keep discard in a jar in the refrigerator up to 7 days, add to it through the week.
For longer, freeze portions.
Use it
Pancakes or waffles
Crackers with olive oil, herbs, and salt
Skillet flatbreads or quick pizza
Muffins, quick breads, biscuits
Discard flavors the dough, it does not provide much lift.
Long-Term Maintenance
If baking daily:
Keep at room temperature. Feed daily with 10 g whole wheat + 50 g all purpose + 60 g water to keep the starter alive.
The day's you plan to bake, increase the ratio of flour and water depending on your recipe needs. Make sure you account for having 60g of your starter left over so you can keep it going!
If baking weekly:
After feeding, let it rise for 1-2 hours, then refrigerate.
Feed it once weekly to keep it healthy.
Before baking, remove from fridge, discard to 60 g, and feed twice at room temperature to reactivate.
If you forget it for a week:
Feed twice daily for 1-2 days, it will bounce back.
Troubleshooting
Very runny: use 55 g water instead of 60 g for one or two feeds.
Gray liquid (hooch): it is hungry, stir it in or pour off, then feed.
Vinegar or nail-polish smell: overdue to feed, give two consistent feeds and it will rebalance.
No rise by Day 8: continue daily for 2-4 more days. Warmer water helps.
Crusty jar walls: transfer to a clean jar after a feeding, hot water rinse only, no soap residue.
Ongoing Maintenance
Baking most days
Keep at room temp, feed daily 10 g whole wheat + 50 g AP + 60 g water.
Baking weekly
Let it peak after a feeding, then refrigerate.
A day or two before baking, take it out, discard to 60 g, feed, and use it when it peaks. One or two refresh feeds make it strongest.
Frequently Asked Questions
Do I have to feed exactly at 24 hours
No. A 1-3 hour swing is fine. Stir it once if you will be much later.
Can I switch between all-purpose and bread flour
Yes. The microbes adapt quickly. Bread flour gives a little more strength, all-purpose is easier to mix. Your standard 10 g whole wheat and 50 g all-purpose is perfect for everyday maintenance.
When exactly do I use the starter for bread
Use it at peak, when it has doubled, looks aerated, and barely jiggles if you shake the jar. The float test should pass.
The Quiet Miracle in a Jar
Watching a starter come alive from flour and water is like witnessing a quiet miracle. Nothing visible happens at first, but then suddenly: bubbles, rise, transformation. It’s patience made visible, a rhythm of creation that mirrors how life grows unseen before it’s revealed. As the Lord said, “The kingdom of God is as if a man should cast seed into the ground…and the seed should spring and grow up, he knoweth not how.” (Mark 4:26–27, KJV)
In every jar of sourdough is a reminder that creation thrives under care, time, and faith. Whether you named your starter or not, you’ve brought something to life and that’s worth celebrating.
Your first loaf is just around the corner and trust me, it's worth the wait!
If you’ve made it to baking day, check out the Ramblin' Big & Bubbly Sourdough Focaccia and get started!
Follow The Rambler’s Guide for more simple, slow-living recipes and real-life experiments. Together, we’re getting back to what’s real.
